How to Solder Jewelry
If you want to work on soldering some of your personal jewelry items like bands or rings, or you do it as your job, this article can help you master your craft.
- Take the time to tightly fit the surfaces and parts to be soldered. Make the edges of the parts of the product fit as tightly as possible to each other and without gaps. Solder will not be able to fill large gaps and gaps, contrary to popular belief, and, I repeat, the tighter the fit, the better the solder will spread and connect the parts to be soldered, and the soldering of the product will turn out to be of better quality.
- Work with the highest temperature solder. Lower temperature solders “mix” worse with the silver surface on the seam and near the seam. The higher the solder’s melting point, the less impurities it has, and the less likely it is to eventually stain and appear as a dark seam on your piece.
- Don’t skimp on the flux. The flux not only helps the solder flow, but a thick, even layer of flux around your seam on the piece also helps prevent overheating and “fire spots”. Lots of fluff is good!
- Choose the shape of your solder for specific soldering tasks. Both wire and sheet solder are the most successful forms for soldering. Choose your solder wisely for your task. Sheet solder, for example, can cover larger areas and sticks better on flat surfaces. Wire work works especially well when, for example, you are soldering a stone frame to a plate, and this is because the capillary action of the flux draws small lengths of the solder wire so that the entire perimeter of the joint is completely soldered.

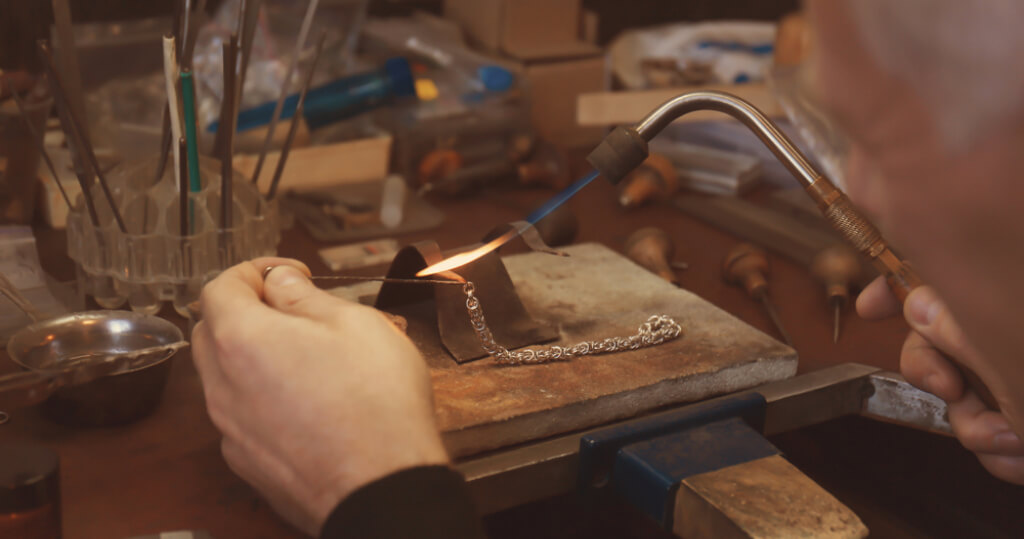
- Use a larger burner flame than you originally intended. The point is to heat up the entire metal to avoid bad solder flow and consequently poor soldering and poor connection of the parts to be soldered. When in doubt, use a burner with a larger nozzle.
- Hold the burner with your non-dominant hand. This will give you more dexterity and dexterity with adjusting the torch flame and using it, allowing you to manipulate solder and metal more easily.
- Use a neutral flame. The best soldering flame that you can barely hear. A sharp, hissing oxidizing flame contains too much oxygen, which can increase the chances of a “fire spot”. The fluffy, loud flame does not contain enough oxygen and is not that hot and not enough for the soldering process.
- Know and study your flame. The hottest point of the flame is about 1/4 inch. (6.5 mm) from the tip of the inner blue flame cone. If you use flame zones that are farther or closer than this point, then you will not heat the products efficiently and correctly.
- Keep the heat distribution in mind. Consider the amount of metal in each of your parts together. If one piece is 75% of the total volume and the other piece is 25%, then spend 75% of your soldering time heating the larger piece and 25% heating the smaller piece.
- Use flux as an indicator. The flux becomes clear and glassy at about 650°C, which is the temperature at which the solder begins to flow. Keep an eye on these changes – this is a good sign that the solder will soon spread and that you are evenly distributing the heat from your torch flame.
- Remove your torch as soon as the solder runs out. Watch for a brilliant flash of solder melting, when this happens remove the torch immediately and stop heating. Overheating of the metal can cause it to become brittle or melt.

- Always cool your metal in water to cool it down before chilling. This prevents you from unnecessary movements with hot metal in your hands and splashing acid chill on yourself. And since the metal will already be cooled, when it enters the chill – less acid chill will get into the micro-cracks in the solder and therefore less likely to discolor the solder at the weld.
- Never chill anything iron or steel. Iron or steel creates a chemical reaction with a chill that can change the color of your metal and the appearance of copper particles on the surface of the metal. Always use copper or plastic tweezers for the reduction reaction in the bleach.
- If you cannot avoid the appearance of “fire spots”, then you can remove them or hide them. The “fire spot” may be “hidden” and your item may look great after bleaching, but as soon as you start sanding and polishing your item, the spot or spots can suddenly show up. “Fire Spots” appear as a dark purple shadow just below the surface of the silver.
Do not worry! If you sand or polish the item, you will eventually remove the stain along with the top layer of silver, and only then polish the item clean. In addition, some craftsmen prefer to apply a thin layer of silver particles through a process called “depletion” to hide the stains.

