How to Make Earrings
How to Make Clay Earrings
If you are new to making polymer clay crafts, these master classes to help you create simple earrings are exactly what you need.
Suitable for work:
- Polymer clay in your favorite colors.
- Knife.
- Accessories (studs, pins, plugs, earrings for earrings, rings, etc.).
- Gloves.
- Toothpicks.
- Pliers.
- Glue.
- Lacquer for polymer clay.
- Plast machine or rolling pin.
- Blade.
- Tassel.
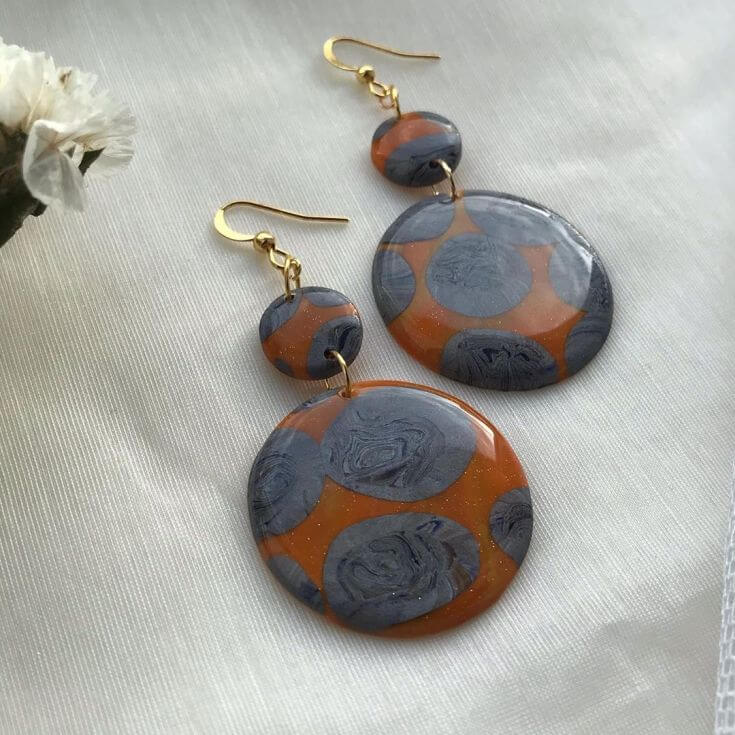
- To make ball-shaped polymer clay earrings, roll a small piece of plastic of the chosen color into a “sausage” of the diameter you need.
- Cut two 2 cm long pieces and two 1.5 cm long pieces from it. Form an even ball with your palms from each of them.
- In smaller balls, use a toothpick to make holes for the silicone plugs, and then place the plugs into them.
- Align the edges so that the seams are not visible.
- In balls with a larger diameter, make holes for the pins with a toothpick, insert the pins and also trim the edges.
- Bake the blanks in the oven, as stated in the instructions for the plastic material – and the “dummy” earrings or false polymer clay stretch marks in the form of balls are ready.
How to Make Earrings with Beads
Handmade jewelry is beautiful, stylish and unique. And such accessories will definitely be loved by you, because you will be proud that you yourself were able to create beauty. You can realize any fantasies by creating your image and creating jewelry. It is not difficult, and our master class will allow you to learn the basic rules and even create the first masterpieces very quickly.

Beaded earrings: why beads?
There are a lot of options from what materials you can create earrings. But today we will focus only on beads.
From this material you can create any earrings – long, short, voluminous or almost invisible. It is very easy to work with this material – if you have wove at least once from beads, you will cope with any scheme. Beads are an inexpensive material, and its choice in stores is huge. By combining colors, sizes, you can create really unique things.
In addition, beads are easy to combine with other materials – beads, glass beads, feathers, ribbons or artificial flowers. This further expands the possibilities to express the imagination.
What will you need?
To create beaded earrings you will need:
- actually, beads. A little later, we will dwell on how to choose it.
- thin needles – with them you will string beads.
- a thread. It must be durable – the quality and safety of the future product depends on it. You can choose a material that includes lavsan, or purely synthetic threads. If you still doubt the strength, you can wax the thread. Sometimes a fishing line can be used instead of a thread.
- wire – thin and flexible. We will use it for elements that should not change shape.
- stitches. Or just zippers. This is the part of the earring that goes through the hole in the ear. Do not use aluminum fasteners – they oxidize.
How to choose beads?
Let’s start with the basics. If you have never encountered work with beads, then you should know that it is divided into the following types:
- beads – classic round beads;
- felling – a short tube with edges;
- glass beads – tubules are longer than cutting, usually with rounded edges;
- charlotte – beads, one side of which is round, and the other is flat. The flat part refracts the rays of the sun and it shines brightly.
Here are some tips for choosing:
- Choose Japanese or Czech beads. It is strong enough that the thread can pass through it several times. Yes, and marriage is not enough in it.
- Before you start creating jewelry, sort through the beads – remove the deformed, defective beads;
- For the manufacture of earrings, you should use small beads.
Basic schemes and techniques
There are a lot of ready-made beaded earrings patterns. And even more you can come up with yourself after you learn the basic techniques and simple techniques. We offer you some of the most common options for accessories, which just use the most common techniques. Study them, try to make the proposed decorations – and you will be ready for your own experiments.
Original options for beautiful beaded earrings that even a beginner can handle
Even if you have never worked with beads before, you can easily cope with the simplest earring patterns. To get started, start with elementary options – rhombus earrings and earrings on a fishing line.
The scheme of weaving earrings on a fishing line
- Cut the fishing line into three pieces of different lengths – twelve, fifteen and nineteen centimeters;
- String beads – on the shortest piece 6 centimeters, on the middle one – 8 centimeters, on the longest – 10 centimeters.
- Gather all the ends of the fishing line together, you will have three drops. Use a fastener as a fastener – fasten the drops in it. The second earring is done in exactly the same way.
It will take you literally 10-15 minutes to create such a masterpiece.
How to Make Tassel Earrings
Spectacular jewelry can transform any image and attract the attention of others. Tassel earrings gained their popularity in the first half of the 20th century and remain relevant to this day. Read on to find out how you can make a stylish accessory with your own hands.
Following the suggested recommendations, making a beautiful decoration is not difficult at all. In the future, you can experiment with the length, splendor, shape of earrings, as well as with their decor.
What you need, what materials to choose
To make the product look beautiful, you need to correctly choose the threads. They should be bright, durable and keep their shape well when finished. As a material, all types of viscose, silk and other smooth threads are used. You can also try shiny polyester. It is not recommended to use cotton threads, as they are tangled and do not shine. In general, the following materials will be needed for work:
- threads for brushes (2-3 skeins);
- hooks, as well as ready-made fittings for fastening;
- decorative elements (beads, rhinestones);
- threads to match the main ones for tying;
- cardboard box;
- glue;
- a sheet of paper for trimming brushes;
- clear nail polish.
IMPORTANT! The cardboard should be selected a couple of millimeters wider than the planned brush.
How to make a brush step by step
- First you need to take the threads, and then evenly and not very tightly wind them on the cardboard. You should get two bases for future brushes. It should be ensured that both brushes are wound uniformly. For greater certainty, you can count the number of turns;
- Next, you need to take other, more durable, threads that match in color with the main ones, and tightly tie them up on one side;
- On the unbandaged side, an incision should be made with scissors;
- Then the brushes must be held for a couple of minutes over the steam, periodically pulling them out and straightening them.
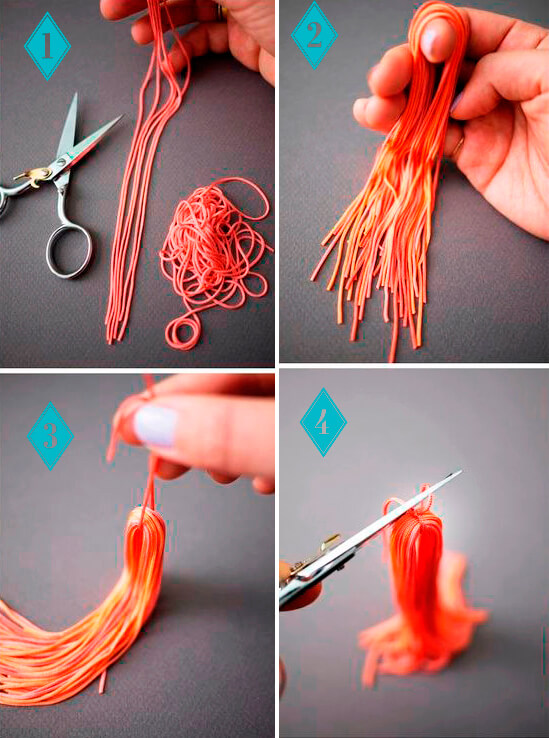
How to fix and align
After the brush is ready, it is rewound with a thread at a distance of 1 cm from the fold. In the course of the winding, several knots are necessarily made for greater strength. The ends of the threads are cut off and treated with a colorless varnish.
An important step is trimming the brush. To do this, it is better to use a piece of paper, which is carefully wrapped around the brush so that the tip is visible. By pulling the thread, determine the desired length and cut off the tip.
How to design, complete the product
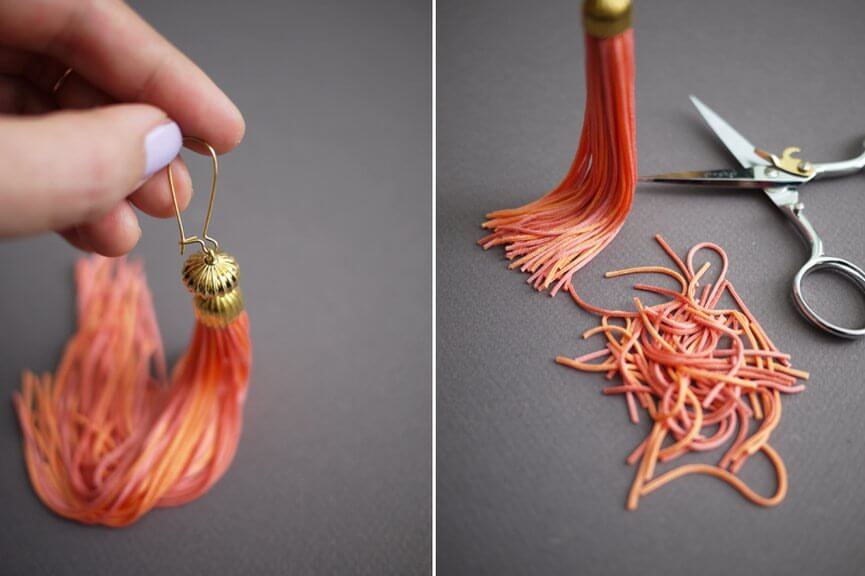
There are many different product design options. In this case, the top can remain open or be decorated with a special hat or trailer. In the first case, the place of the element’s constriction can be decorated with a beaded chain.
Then carefully insert the connecting rings into the fold, align them and fix the joint with varnish. The auxiliary thread is cut off, and the earrings are ready for further work. The product can be decorated and attached to special fittings.
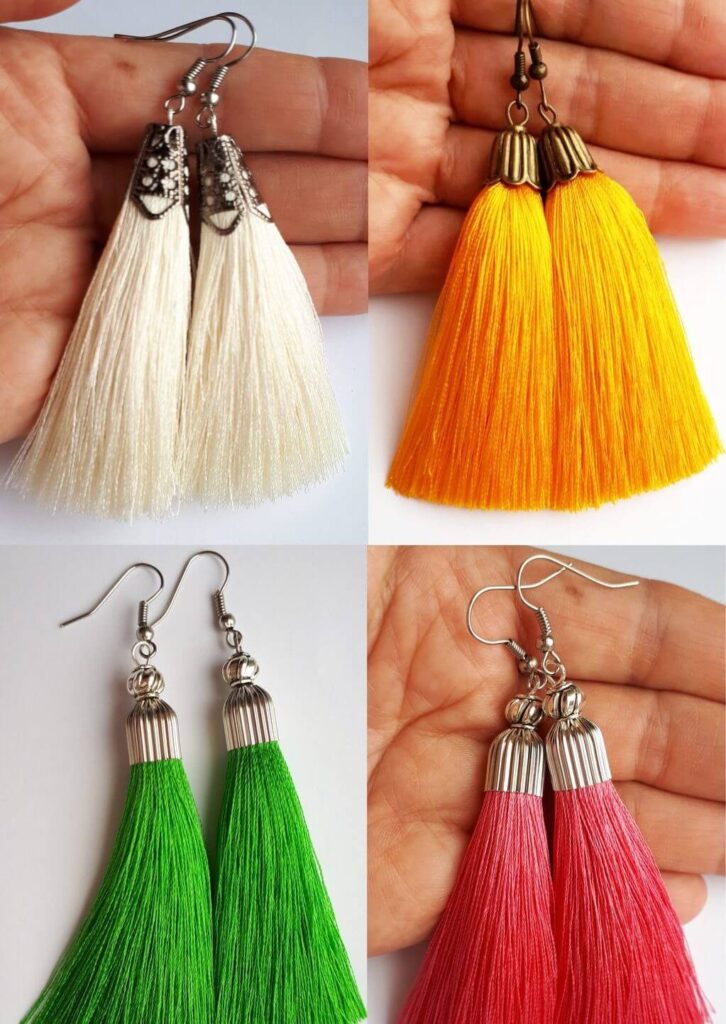
In the second case, a cap of the corresponding parameters is put on the pin. The brush should be rewound not by 1 cm, but less so that the threads are not visible. Next, the pin is twisted into a ring and a fastener is put on.
Tassel earrings can be worn not only on special occasions, but also in everyday life. Having at your disposal a set of threads of different colors, you can make your own earrings for each look in just a few minutes.
How to Make Leather Earrings
What kind of leather can be used to make earrings?
Such a thing can be created from unnecessary items that are out of fashion or pretty worn. For example, bags, belts, gloves made of natural or artificial materials. Leather, suede, velor are better suited for this purpose, they look more elegant and more expensive than leather substitutes.
Tools you will need
For the production of any earrings, you will need a standard set of accessories:
- patches of skin;
- scissors;
- awl;
- round nose pliers;
- hot gun or superglue in a tube with spot application;
- lighter;
- tweezers;
- accessories;
- paper and pencil;
- earplugs.
For those who don’t know what earplugs are, they are hanging elements in the form of a hook that are inserted into the hole in the earlobe. Sold in stores selling goods for needlework and accessories.
How to make earrings – step by step instructions
If the above items are available, add an irresistible desire to create and a great mood. Since inspiration is the key to success in the manufacture of our jewelry.
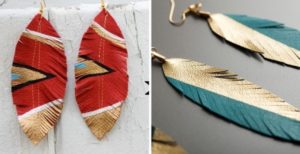
Leaves
This is the easiest way, on the basis of which, as you gain experience, you can create more complex and interesting models:
- The size of the details depends on how large the flap is taken. Based on these parameters, draw a leaf on paper.
- Cut out the template and trace it with a pencil on the wrong side of the leather. Such blanks will need 2 pieces. In the case when the material is already shabby and dirty, make 4 parts. They will have to be glued together so that the decoration has a neat appearance. Important! Don’t forget that the second drawing should have a mirror image.
- Cut a thin fringe along the edges. If there are 4 leaves, then first connect them with glue.
- The next step is to decorate the leaves. You can make veins from the chain.
- Place “dew drops” of small transparent beads, large beads, rhinestones.
- Attach mini patches with ladybugs or other bugs, butterflies.
- A beautiful option with embroidery and guipure ribbon in the form of bows.
- We pierce a hole in the upper part with an awl. We introduce a ring of fasteners into it. We try on and are proud of the achieved result.

